Instructions for use
software package
FB-posting Professional
To operate the complex you will need:
— A computer running Windows 11.
— Purchased or self-registered Facebook accounts.
— A key, which can be obtained from Telegram: @FB_posting_com
Important!!! The software can be installed on an unlimited number of computers, but only one instance of the program can be running at a time with the same key. Any other instances will stop working.
Currently the complex consists of three programs:
— A program for adding cookies from purchased accounts to browser profiles.
— A program for opening a standard Google Chrome browser with account profiles.
— A program for automatically posting messages to Facebook groups on behalf of specified accounts.
We plan to add programs for liking and commenting on posts in the future.
Caution! When creating a new profile, it is recommended not to immediately enable it for auto-posting.
When accessing it from this profile, Facebook marks it as "accessed from a new device" and treats it with suspicion.
Even if this account is old and has been previously used in a different browser, we recommend warming it up manually using our program.
Information on how to properly warm up Facebook accounts can be found online.
Verified accounts are most effective.
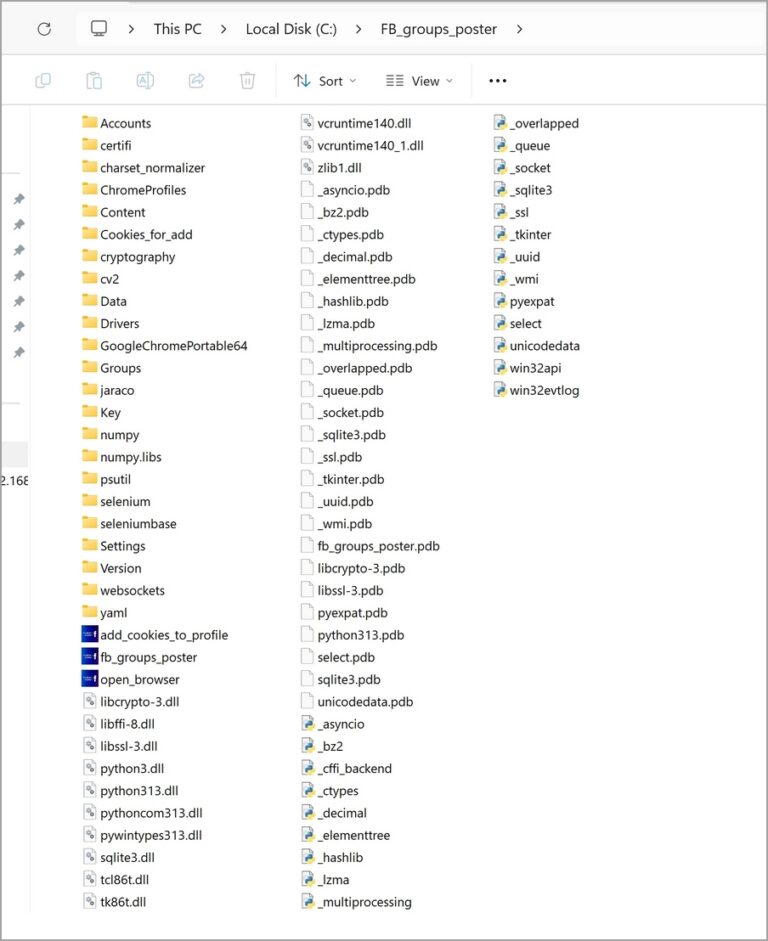
Brief description of folders and files required for setup and operation:
[1] open_browser.exe — a program for manually opening the Google Chrome browser. When launching, you must select the desired account profile.
[2] fb_groups_poster.exe — a program for automatically posting to any Facebook groups.
[3] add_cookies_to_profile.exe — a program for adding account profile cookies. Used when adding cookies from purchased accounts to work profiles or when transferring a profile from another browser.
[4] folder \Accounts\ — contains the "accounts.txt" file, which defines lists of work accounts.
[5] folder \Content\ — contains folders for shared or individual post content for each account.
[6] folder \Groups\ — contains files for lists of shared or individual posting groups for each account.
[7] folder \Key\ — the program key is copied here.
[8] folder \Settings\ — contains the “settings.txt” file, which specifies the automatic posting settings.
The remaining folders and files are necessary for the programs to function and do not need to be changed in any way.
3. Before starting, copy the resulting key text file to the C:\FB_groups_poster\Кеу\ folder.
4. Create a list of account profile names.
To do this, open the file "/Accounts/accounts.txt" in a text editor (we recommend the free editor https://notepad-plus-plus.org).
Enter a profile name in each line.
The account profile name can be anything, but it must be written in English letters without spaces.
You can also use underscores and numbers.
If you need to temporarily disable an account, simply comment out the line containing the account name by placing a hash sign (#) at the beginning of the line.
If you need to use an account with a proxy, you can specify the proxy after the | sign.
For example:
Tom_Gray
# Vera_Green | myproxyserver.com:52765
Serge_Red | 192.168.1.1:52765
Important! To receive statistics and program logs, you must launch our bot @FB_posting_com_bot and click "Start."
5. Setting up and running the program for adding account profile cookies
— Open the file \Cookies_for_add\cookies.txt in a text editor.
— Enter the account cookies in JSON format. Cookies are typically issued in this format when selling accounts. The cookie string should begin with "[" and end with "]".
— Run the program add_cookies_to_profile.exe.
— Select the account profile where you want to save the cookies.
— The program will add Facebook cookies to the selected account and close. The cookies.txt file will also be cleared.
— If necessary, repeat these steps for other accounts.
6. Configuring and Using the Google Chrome Browser Opener
— Run open_browser.exe
— The window that opens will display a list of accounts specified in the accounts.txt file.
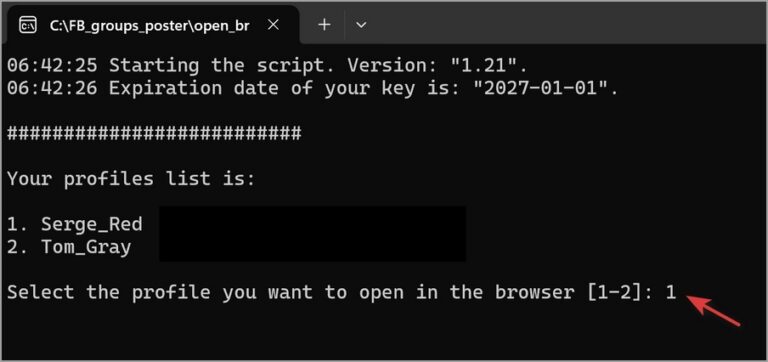
Select the account profile you want to open the browser with.
— Work in the browser that opens.
7. Setting up and running the program for automatic posting to any Facebook groups.
Step 1.
Before you begin, create a list of groups to which you will post.
Create a text file with the list of groups in the \Groups\ folder.
The group URL is written on a separate line.
There should be no spaces in the text.
You can create general and individual group lists for each account.
If you create a file in the \Groups\ folder in the format account_name_groups.txt, for example, Tom_Gray_groups.txt, this account will post to its individual group list.
If you haven't created an individual group list for an account, you should create a file called common_groups.txt.
All accounts without individual lists will post to the groups in the general list called common_groups.txt.
Step 2.
Upload content for posting to Facebook groups.
The \Content\ folder contains folders containing content for posting.
Content can be shared across all accounts or specific to each account.
The \Content\Common_content\ folder should contain content shared across all accounts. This content will be used by all accounts that don't have individual folders created for them.
If you create a folder with the account name (as specified in accounts.txt) and the content line, for example, \Content\TomGray_content\, that account will post content from that folder.
Each post variant is a separate folder, placed within the general \Content\Common_content\ folder or within individual folders.
The folder name can be anything, but must be in English without spaces.
The content of each post can contain:
— text file .txt and media files (up to 10 media files).
— text file .txt only.
— Media files only (maximum 10 media files).
Text file parameters:
— The text can be in any language.
— UTF-8 text encoding without BOM.
— The file name can be any, but must be in English characters without spaces.
Media file parameters:
— Format: .jpg, .jpeg, .png. Size no more than 200 KB. Resolution no more than 1200 pixels on the longest side, 96 DPI.
— Format: .mp4, .mpeg. Size no more than 2-3 MB.
— The file name can be any, but must be in English characters without spaces.
To improve posting efficiency, you can use templates to randomize the text.
In this case, each post posted in the group will be identical in content but unique in format.
This will prevent Facebook from marking it as "Potential Spam."
Special characters are used for randomization:
Curly brackets { } — randomly select one of the options
Square brackets [ ] — randomly select all options
Vertical bars | — option separator in curly and square brackets
Example with curly brackets:
{Hello|Hi|Good afternoon}, my dear friend!
Every time you send a message, the program will randomly select one of the options:
1. Hello, my dear friend!
2. Hi, my dear friend!
3. Good afternoon, my dear friend!
Example with square brackets:
[old|good|faithful] friend
Each time you send a message, the program will select a random word order:
1. A old good faithful friend
2. A faithful good old friend
3. A good old faithful friend
4. A good faithful old friend
Example of nested randomization:
{[text1|text2]|[text3|text4]}friend
The example uses two levels of randomization, first one group of words will be selected, [text1|text2] or [text3|text4], then the order of the words within the selected group will be randomized.
1.text1 text2 friend
2. text2 text1 friend
3. text4 text3 friend
4. text3 text4 friend
Randomizing individual words is much more effective than randomizing entire sentences.
For example:
{Please note - |Don't miss out} {|our} {new|unique} {|special-}offer.
You can use constructions with omitted words like {|text}—this allows you to add variety to your text.
For example:
I would like to welcome {|all} my subscribers.
The randomization system allows for nested randomization of any complexity, changing sentences, phrases, words, and even individual letters, such as {i|u} or {p|n}.
Step 3.
The \Settings\ folder contains a text file called settings.txt, which sets the posting parameters.
log_level=DEBUG
account_reuse_delay_minutes=5
delay_use_next_account_minutes=5
max_posting_per_session=3
max_posting_per_24h=20
post_if_pending_present=yes
send_tg_if_wait_approve_in_group=no
send_tg_if_unsuccessful_posting=yes
Description of parameters:
log_level — "DEBUG" means that full information about the program's actions is recorded in the log file (the value "INFO" means brief information).
account_reuse_delay_minutes — the time interval (in minutes) before an account is restarted.
delay_use_next_account_minutes — the time interval between the next account launch.
max_posting_per_session — the maximum number of posts per session (from opening the browser to closing it).
max_posting_per_24h — the maximum number of posts in the last 24 hours.
post_if_pending_presents — "yes" — post to groups that have posts awaiting administrator review; "no" — do not post.
send_tg_if_wait_approve_in_group — "yes" — send a Telegram message if the post is pending approval by the group administrator; "no" — do not send.
send_tg_if_unsuccessful_posting — "yes" — send a Telegram message if the post has not been posted for any reason; "no" — do not send.
Step 4.
Once configured, launch the posting program -fb_groups_poster.exe and it will begin automatically posting to Facebook groups.
If you need to stop the program while it's running, simply close the program console and your browser.
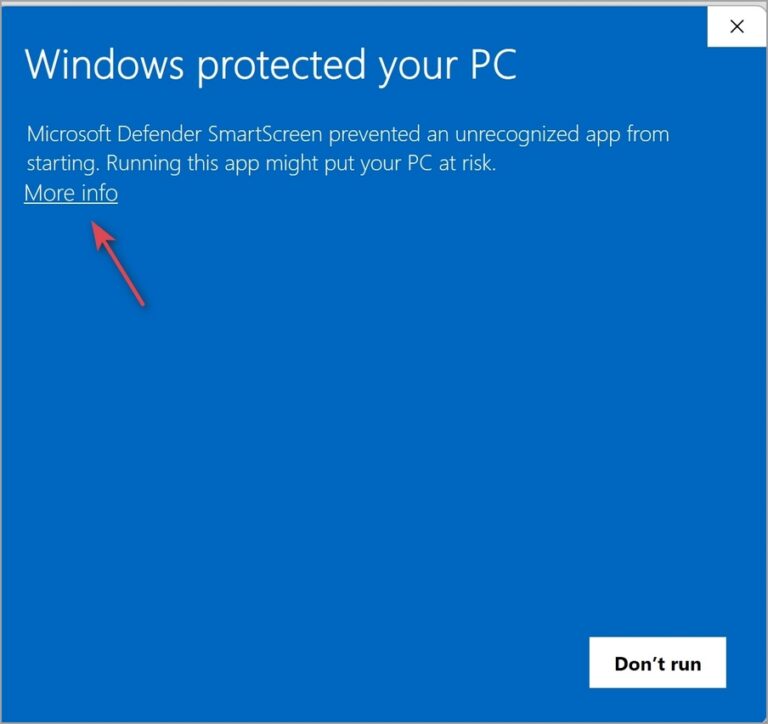
Since the program is downloaded from the internet, when you first run the .exe file, a blue window may appear with the warning "Windows protected your PC". Click "More info" and then "Run anyway".